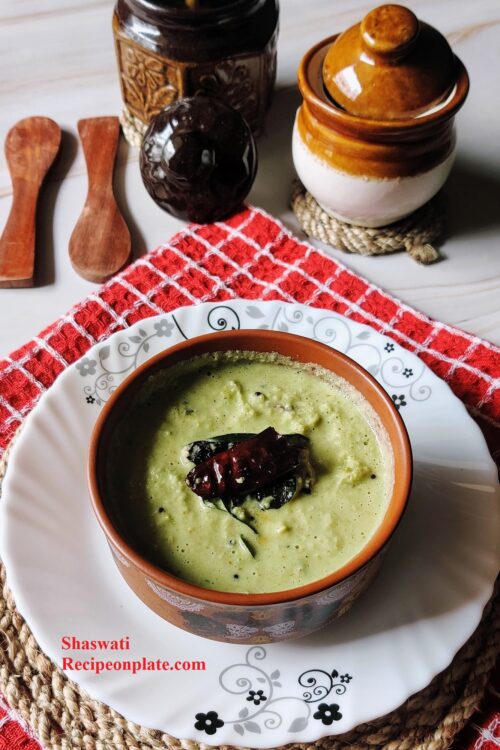
Coconut Chutney is an essential side dish for several South Indian breakfast dish. It is thick, flavorful and very easy to make. If you are thinking about making dosa and idli at home, try this as well. It will enhance the experience of having idly or dosa a lot.
It is so simple that you can make it within 15 minutes and you can easily store it for at least 7days at 3°C. I heard it stays good for longer period in negative temperature, but never tried it. You can try and let me know in comments.
India is full of flavors, and it is so spread out across the country that in every part of India you can enjoy a different flavor of a same dish. Even every state has its own signature dishes as well.
I feel that I am quite expressive, when I am taking to my readers through my writing. So lets stop taking and jump to the recipe here..😉

INGREDIENTS
1cup-240ml; 1tablespoon – 15ml ; 1teaspoon – 5ml;
Ingredients for the chutney
- Coconut (chopped) – 1 +1/2 cup
- Toor Dal – 2 tbsp.
- Chana Dal – 2 tbsp.
- Peanut – 1/4 cup
- Coriander Leaves – 1/2 cup
- Green chilies – 4 pieces
- Sugar (optional)- 1 tsp
- Salt – 1 tsp
- Lemon juice – 1 tbsp.
- Water – 1+1/4 cup
Ingredients for Tempering the Chutney
- Curry leaves – 10-12
- Mustard seeds – 1 tsp
- Hing (Asafoetida) – 1/2 tsp
- Dries red chili – 1 piece
- Mustard oil – 2 tbsp.
Equipment
- Mixer grinder
- Normal Fry Pan
Notes
How to make Coconut Chutney
Step 1: Firstly, we need all the ingredients on the table top. If you are using grated coconut then just put it inside the grinder. But if you are using slice or chopped coconut, then cut them into smaller pieces.

Step 2: Now in the same container, add roasted toor dal, chana dal and peanuts. If you don’t know how to roast them, read the notes above.

Step 3: At the same time put coriander leaves, green chilies and 1/2 cup of water. Blend them for 1 minute. It might take couple of grinding cycles to get a smooth paste.
Tips: Wait for 1-2 minutes between each cycle. So the roasted ingredients get moist and easily grind next time.

Step 4: After that open the mixer jar, add sugar, salt and lemon juice into the jar. Here, if water is required, add 1/4 cup of water again into it. Blend them all for another 1 minute.
Step 5: Our Coconut Chutney is ready, now it’s time to tempering the chutney. So take the chutney paste in a big bowl. Here you can add water and make the coconut chutney as thick as you require. I have used 1/2 cup more water here.

Step 6: Now take a frypan and preheat it. Then add 1 tbsp. of oil and wait for smoke out from it. Here we will add 1 dried red chili, curry leaves, mustard seeds and Hing (asafoetida) in the oil. Wait for spluttering the mustard and just pour them all into the coconut chutney paste.

Step 7: Here the chutney needs a good stir and 15 minutes to rest. This 15 minutes help the chutney to absorb the smell from the curry leaves and tempering ingredients.
Step 8: Regular South Indian style Coconut Chutney is ready to be served with hot and crispy Dosa and Idli. Enjoy your morning.
If you are looking for some Dosa recipe here they are..
Our (Recipeonplate) mission is to share recipes in easy words with proper step by step cooking instructions, pro tips and accurate measurements. So that it can help both pro, occasional and novice home chefs. If you like our effort and want to support us please share this recipe to your social media. We thank you for reading this recipe and hoping to see you again in our website.
Frequently Asked Questions
What is coconut chutney made of?
Apart form coconut it contains curry leaves, chana dal, toor dal, peanuts, salt, sugar, coriander, chilies and oil.
It is very easy to make, 15 minutes are good enough to make this chutney at home.
Can we freeze coconut chutney?
Yes you can freeze it for at least 7 days. For that make the coconut chutney as thick as possible and store it in a air tight container. When you need this chutney, just take that much and then freeze it again.
After taking out, here you should add little water to make the thick coconut chutney thin. Wait for 10-15 minutes to get it at room temperature.
How long does coconut chutney last in the fridge?
It’s depends on your storage process and freezing temperature. I have not stored it for long, but it can be.
What do you eat coconut chutney with?
It’s a very good question actually. This coconut Chutney is belongs to Indian cuisine, mainly from Southern part, Where coconut chutney is very regular item and a great combo with Idli , Dosa, Medu-Vada and many more.
