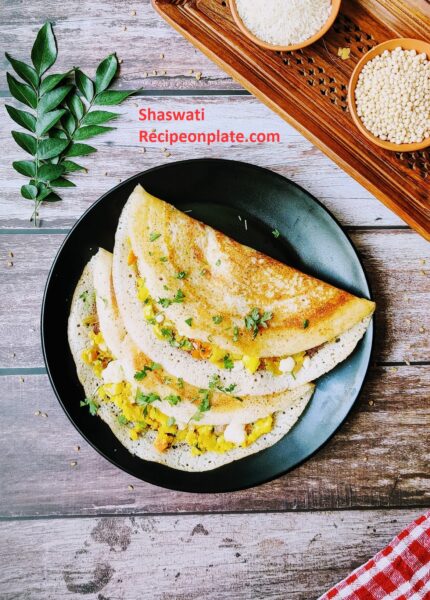
Paneer dosa is mainly a breakfast dish. Dosa is the most regular breakfast dish of south India. It is mainly made with grinded rice or rice flour and dal.
Now a days, There are many types of dosa batter or mixture available in market. Like millet dosa batter, brown rice dosa batter, dry dosa mixture.
As per my experience, there is nothing better than fresh home made one.
Dosa is a healthy & tasty food. There are countless varieties of this- masala dosa, paneer dosa, rawa dosa, set dosa are name of just a few.
Today I am going to share with you homemade paneer dosa recipe using my homemade dosa batter.

INGREDIENTS
1cup-240ml; 1tablespoon – 15ml ; 1teaspoon – 5ml;
For dosa
- Dosa batter – 2 cup
For paneer masala
- Paneer (shredded)- 1/2 cup
- Boiled potato (optional)- 1/2 cup
- Onions (chopped) – 1/2 cup
- Tomato (chopped) – 1/4 cup
- Coriander leaves (chopped) – 1/4 cup
- Lemon juice – 1 tsp
- Curry leaves – 2 bunches
- Dried red chili – 1 piece
- Mustard seeds – 1/2 tsp
- Turmeric powder – pinch of
- Salt – 1/2 tsp / as per your taste
- Oil – 2 tbsp.

Equipment
- Non Stick Tawa
Notes
How to make paneer masala for dosa
Step 1: Firstly take a preheated fry pan the add 2 tbsp. of oil into it. Now add a dried red chili, mustard seeds and curry leaves. Wait for crackling of mustard seeds.
Step 2: After that add chopped onions and fry for 2 minutes. Then add tomato, pinch of turmeric into it. Roast for another 2 minutes.
Step 3: Now its time to add boiled potato. Similarly add shredded paneer, salt and coriander leaves. Mix them very well. Even you can smash them by using a smasher.
Step 4: Finally add 1 tsp of lemon juice and mix them all together. Paneer masala is ready to put inside the dosa.

How to make paneer dosa
Step 1: Firstly take the all ingredients in perfect quantity. Shred the paneer before using it it the masala.
Step 2: Now take a preheated non-stick tawa (temperature should be medium of the tawa). Then add 1/2 cup of dosa batter on it. after that spread it evenly using a flat steal bowl from center to out side. Make you dosa as round as possible. Wait for 1 minutes.

Tips: My tawa diameter is 25 cm and perfect for a large dosa. So I have used 1/2 of batter. Use dosa batter accordingly your tawa size. Otherwise you dosa would be thick so you might not enjoy the crispiness of dosa.
Step 3: At this point put 1 tbsp. of butter on the top of dosa and spread then equally. Cook the dosa for another 2 minutes on medium flame. It make the dosa crispy and perfect brown in color.
Step 4: Now add the paneer masala on it. I like cheese in my dosa, So I have added it on top of the paneer masala.

Step 5: Try to fold the dosa from that side, which came out first from tawa. For this use a thin spatula.

Step 6: Take it out on a plate and make the other dosa using the same methods.
Step 7: Serve with green coconut chutney and sambar. Enjoy your fresh morning with delicious breakfast.
Our (Recipeonplate) mission is to share recipes in easy words with proper step by step cooking instructions, pro tips and accurate measurements. So that it can help both pro, occasional and novice home chefs. If you like our effort and want to support us please share this recipe to your social media. We thank you for reading this recipe and hoping to see you again in our website.
Frequently Asked Questions
Why is my dosa not crispy?
If you are making homemade dosa batter. Then add soaked flattened rice during the grind of rice and dal. Flattened rice will make your dosa more crispy.
On the other hand use the perfect measurement of all ingredients to make perfect dosa batter.
Which rice is used for dosa batter?
There are two type of rice in market, one is raw rice and other is steam rice. Mainly we have bought dosa rice or raw rice to make dosa batter.
Dosa rice is raw rice, We will make dosa after soaking them into water for over night or 8 hours.
I suggest you that don’t make dosa batter using steam rice. In that case, your dosa will stick on pan and wouldn’t come out properly.
How can I thicken my dosa batter?
If you have bought a pack of market’s dosa then add little water. Sometimes water is not require in that batter.
But if you make your dosa batter by your own. Then use less water when you mix all ingredients or during the grinding time.
Make the batter as thick as possible. And add water after getting fermentation of the batter. I hope this technique help you and you would make your perfect dosa batter from next time.🙂


[…] Paneer Dosa […]
Suggestion – It taste better without onion.
It’s mostly on personal preferences. Thanks for leaving suggestions. Please keep in touch.
I miss this so much away from home.
I can understand. You can try and make it yourself.
[…] Read in English […]